Normal Map Looks Inverted in Unity? A 5-Step Fix
Use a reference plane to identify green-channel, texture-type, compression, tangent, and UV problems in Unity normal maps.
Quick answer
When a Unity normal map looks inverted, first import it as a Normal map, then A/B test the green-channel flip on a known bump under a directional light. If both versions look wrong, isolate compression artifacts and tangent or UV issues. A preview plane makes each check reproducible.
Which symptom points to which setting?
| Symptom | First check | Expected observation |
|---|---|---|
| Whole surface looks concave | Flip Green Channel | Known relief changes direction vertically |
| Looks flat or overly dark | Texture Type and shader input | Normal detail returns under side light |
| Tiny noisy squares or halos | Platform compression and max size | Cleaner result on an uncompressed copy |
| Wrong only at mirrored UVs | Tangents and mirrored island handedness | Same source looks fine on a clean plane |
| Grain repeats with a visible gap | UV tiling and source edge quality | Seams follow texture boundaries |
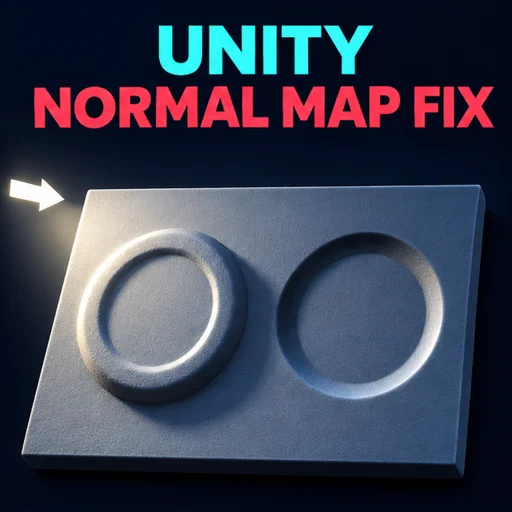
How do I isolate the cause in five steps?
1. Make the light and geometry repeatable
Use a plain plane with a predictable UV layout. Add a directional light that grazes the surface and use a material with only Base Color and Normal assigned. Keep the camera still and use a duplicate material for comparisons so overrides on other assets cannot obscure the result.
2. Set Texture Type to Normal map
Select the texture asset and check the Inspector. Apply the import change, then connect the result to the Normal input on the actual material. If using Shader Graph, use a normal-aware sample and choose the coordinate space the graph expects. A near-neutral area should encode roughly RGB (128, 128, 255) in the original PNG.
3. Flip green once
Try the Flip Green Channel importer setting or make a converted PNG. Test only one at a time. A known ridge in a DirectX-style source should face the light correctly when converted for the project. Save the convention in the asset name or source preset to prevent a second flip next time it is exported.
4. Test without platform compression
Compare the same texture on a temporary uncompressed import with an adequate max size. Check the target platform override, especially for mobile builds. If blocks disappear, tune compression for the target platform. Leave the normal convention alone while checking compression.
5. Compare the production mesh
Return to the model and compare the orientation of errors on the plane and mesh. Seams that follow mirrored islands, hard edges or skin deformation point toward tangents, UVs or bake settings. Verify the exported vertex tangents and triangulation against the bake before committing changes.
Open the free browser tool to run the conversion with your own texture.
Frequently asked questions
Why does my URP material look fine in the Inspector and wrong in the scene?
The scene may use a different material instance, a renderer override, or a different platform build configuration. Inspect the rendered object's material and its normal strength, then repeat the plane test within the same scene.
Should I flip red as well as green?
The usual OpenGL versus DirectX tangent-space conversion flips green. Red problems can indicate a different UV direction, an object-space map, or a nonstandard asset convention. Check the source documentation and a known relief feature first.