Height vs Bump vs Normal vs Displacement: 4 Uses Compared
Match each texture type to its shader input, silhouette needs, and bit-depth requirements.
Quick answer
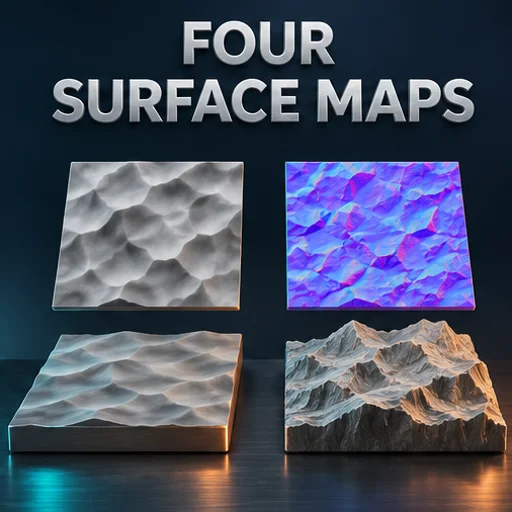
A height map stores relative elevation. Bump derives shading changes from a height input, while a normal map encodes the direction directly in RGB. True displacement moves surface geometry and can alter the silhouette. Choose by the desired screen-space detail, geometry budget, and the shader’s supported inputs.
Which map should I use?
| Technique or input | Data | Changes silhouette? | Slot or destination |
|---|---|---|---|
| Height | Grayscale relative elevation | Depends on consumer | Bump, displacement, or height-to-normal |
| Bump | Height-derived shading | No | Bump node or shader |
| Tangent normal | RGB encoded direction | No | Normal map input |
| True displacement | Height interpreted as geometry movement | Yes | Geometry-capable shader and tessellation or subdivided mesh |
How does this apply to a brick wall?
For a distant wall, a normal map can show brick corners and mortar under shifting light with modest geometry. At grazing angles, the silhouette stays straight. For a close-up wall edge, use actual displaced or modeled geometry for the deep mortar changes, then keep a normal for finer grain. If both maps use the same height information, tune the scales separately to avoid exaggerating the same feature twice.
How do I choose bit depth?
Use 8-bit data when the shading transition looks clean and the engine export preserves the intended values. For slow displacement gradients, a higher-precision height can reduce visible terraces. In an unsigned 8-bit file there are 256 representable levels. In a 16-bit unsigned file there are 65,536. A file conversion alone does not remove steps that are already present in the source. Compare the original working image, the resulting file, and the target texture import.
How do I verify the material?
- Look at the texture alone and confirm the expected contrast or near-neutral height level.
- Import data maps as linear or Non-Color and use the engine's normal-specific setting for normal textures.
- Compare the face-on and edge-on views. If you need actual depth at the border, compare against a model with displacement enabled and enough geometry.
- Keep one version of the scene with displacement off, so lighting and geometry effects can be inspected independently.
Open the free browser tool to try this workflow with your own texture.
Frequently asked questions
Can I feed a height map to a normal input?
The normal sampler expects encoded directional components. Convert the height to normals or connect the height to a supported bump node. Set Y direction when exporting the resulting normal.
Does parallax count as true displacement?
Parallax techniques offset texture lookups to simulate depth. Unless the shader changes the underlying geometry, the outline remains fixed.