Roughness vs Smoothness Maps: Invert and Calibrate PBR Reflections
Convert roughness to smoothness and verify reflection width, channel placement, and linear import.
Quick answer
Roughness controls how broadly a surface scatters reflections. Smoothness is its inverse in common game-material workflows. Convert in linear values with smoothness = 1 − roughness, or subtract each 8-bit sample from 255. Check which channel the shader uses and compare under a light that produces visible reflections.
What roughness values should I try first?
| Example surface | Starting roughness | Complementary smoothness | What to compare |
|---|---|---|---|
| Very calm water | 0.02–0.12 | 0.88–0.98 | Narrow environment highlights |
| Polished metal | 0.08–0.25 | 0.75–0.92 | Bright reflection and fine grain |
| Finished wood | 0.3–0.65 | 0.35–0.7 | Clear finish versus bare grain |
| Dry concrete | 0.6–0.9 | 0.10–0.4 | Broad reflection and subtle variation |
These are visual starting ranges for conventional normalized shader controls. Surface finish and lighting matter more than the object name. A wet concrete patch can behave very differently from an adjacent dry patch.
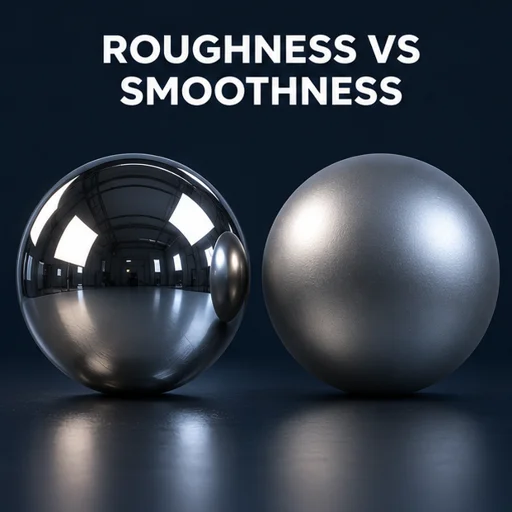
How do I do the conversion and confirm it worked?
- Decide whether the target reads roughness or smoothness. Unreal generally uses Roughness. Unity HDRP uses Smoothness in Mask Map alpha.
- Invert the actual grayscale data. Roughness 0.2 becomes smoothness 0.8. In an 8-bit texture, a stored value of 51 becomes 204.
- Use a data-texture setting or disable sRGB. If the source is packed ORM, use the texture channel packer to map and invert the channels for HDRP.
- Test two patches with clearly different values under a large light and an environment with identifiable features. Observe how the reflection shape changes while keeping metalness and exposure stable.
- Check the asset in the target build. If the apparent transition looks different, review compression and mip levels before rebuilding the texture.
Why can the same number look different across shaders?
Renderers can use different BRDF models, roughness remapping, and reflection filtering. Perceptual roughness and the internal microfacet parameter are often related nonlinearly. Invert the authored grayscale value once when moving to a shader that expects its complement. Let the shader apply its own internal math.
Open the browser tool to try this workflow with your own texture.
Frequently asked questions
Can I invert the entire RGB image to get smoothness?
Use only the roughness channel. Inverting every component of a packed image also changes occlusion and metallic data, which breaks the material.
Should I use a brighter roughness map for a softer highlight?
For a conventional roughness map, higher values usually scatter the highlight more broadly. For smoothness, higher values sharpen it. Confirm by testing a solid swatch.